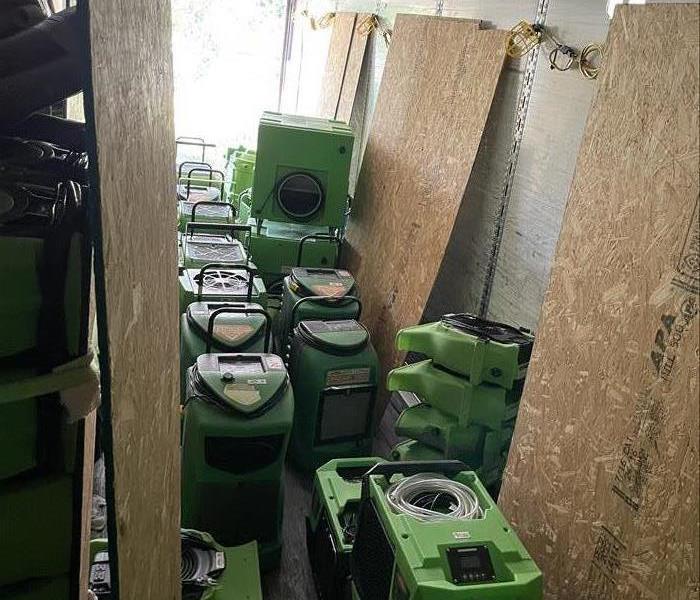
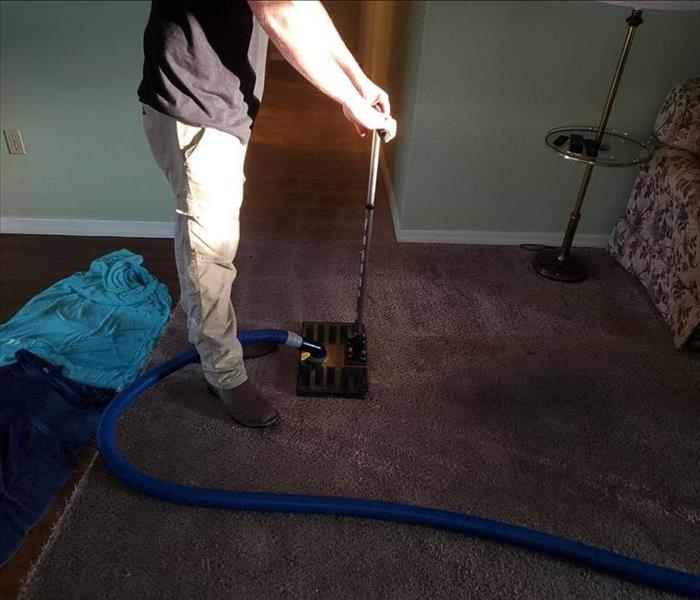
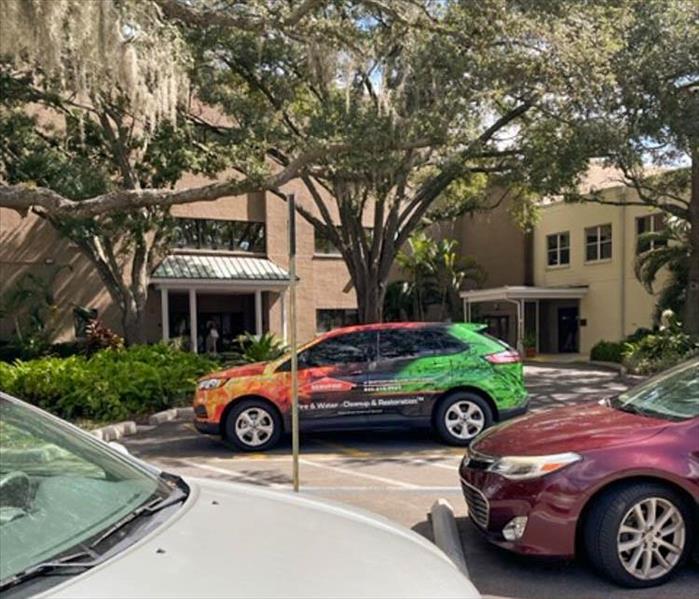
Recent Water Damage Posts
How Landscaping Can Prevent Basement Flooding: A Guide for Homeowners
10/16/2024 (Permalink)
 This blog will explore how strategic landscaping can protect your home from basement flooding.
Basement flooding is a homeowner's nightmare, causing thousands of dollars in damage and leading to long-term structural issues. In fact, nearly 98 percent of basements will experience some form of water damage during their lifespan. Proper landscaping can be one of the most effective measures to prevent basement flooding. While most people associate landscaping with aesthetics, its role in water management is crucial. This blog will explore how strategic landscaping can protect your home from basement flooding.
How Landscaping Prevents Basement Flooding
Landscaping is more than just planting trees and flowers. It involves designing your outdoor space to manage water runoff effectively, preventing it from entering your home. Here’s how:
1. Proper Grading and Sloping
One of the most important elements of flood prevention through landscaping is proper grading. Grading refers to the slope of your yard, which should direct water away from your home’s foundation. If your yard slopes toward your home, rainwater and melting snow can accumulate around the foundation, eventually seeping into your basement.
A well-executed landscape grading plan should ensure that all water flows away from your home. Ideally, the soil should slope at least six inches over a 10-foot distance away from the house. Consulting with a professional landscaper can ensure the grading is done correctly.
2. French Drains and Dry Wells
Installing French drains is another effective landscaping solution. A French drain is a trench filled with gravel or rock containing a perforated pipe that redirects surface water and groundwater away from the home. By integrating French drains into your landscaping design, you can significantly reduce the risk of basement flooding.
Dry wells are another option, especially in areas where water tends to accumulate. These underground structures collect excess rainwater and allow it to slowly seep into the ground, preventing water buildup near your foundation.
3. Using Native Plants for Water Absorption
Plants play a vital role in water management. Native plants, in particular, are excellent at absorbing rainwater due to their deep root systems. These plants can help reduce runoff by soaking up excess water that would otherwise flow toward your home’s foundation.
When choosing plants for your yard, consider varieties that are well-suited to your local climate. Native plants require less water and maintenance, and they are better equipped to handle your area's specific rainfall patterns.
4. Rain Gardens for Stormwater Control
A rain garden is a landscaped area designed to collect and absorb rainwater runoff from roofs, driveways, and other hard surfaces. It’s essentially a shallow depression that’s filled with plants, mulch, and soil that work together to absorb water.
Rain gardens not only add beauty to your landscape but also help manage stormwater by reducing runoff and allowing the water to naturally filter into the ground. By preventing water from pooling near your home, you minimize the risk of basement flooding.
5. Maintaining Gutters and Downspouts
While it may not seem like a part of your landscape, your gutters and downspouts are essential in directing water away from your home. Ensuring your gutters are clean and that downspouts extend at least five to ten feet away from your foundation is crucial in preventing water from pooling around your home.
Consider adding splash blocks or extending the downspouts further if needed. These simple yet effective landscaping solutions can prevent a basement flood.
Importance of Professional Landscaping for Flood Prevention
While some landscaping tasks can be DIY, preventing basement flooding requires a well-thought-out plan that considers your entire property’s drainage. Working with a professional landscaping service ensures that grading, drainage solutions, and plant selection are optimized to protect your home. A professional will assess your property’s unique needs and design a landscaping plan that effectively manages water and prevents flooding.
Conclusion
Investing in the right landscaping solutions can save you from the financial and emotional stress of a flooded basement. Proper grading, the installation of French drains, rain gardens, and using native plants are all effective strategies that help redirect water away from your home. By working with landscaping professionals, you can create a yard that is not only beautiful but also functional in protecting your home from water damage.
Take the necessary steps today to safeguard your basement, and let landscaping be part of your flood prevention strategy.
How Accurate Are Air Mold Tests?
7/17/2024 (Permalink)
At SERVPRO®, we understand that mold can be a major concern for homeowners and business owners alike. One common method to identify mold presence is through air mold tests. But how accurate are these tests, and can they truly provide reliable results? In this blog, we’ll dive into the intricacies of air mold testing and explore its accuracy.
Understanding Air Mold Tests
Air mold tests involve collecting samples of air from your home or business and analyzing them for mold spores. These tests are typically conducted using spore traps or air sampling pumps that capture airborne particles on a sticky surface or in a liquid medium. The samples are then sent to a laboratory where they are examined under a microscope to identify and quantify mold spores.
Factors Affecting Accuracy
Several factors can influence the accuracy of air mold tests:
- Sampling Location: The location where air samples are collected plays a crucial role. Sampling in areas with visible mold growth or water damage will likely yield higher mold spore counts. Conversely, sampling in clean, undisturbed areas may not provide an accurate representation of the overall mold presence.
- Timing and Conditions: Mold spore levels can fluctuate based on environmental conditions such as humidity, temperature, and airflow. Sampling during different times of the day or under varying weather conditions can affect the results. For example, high humidity levels can increase mold spore counts in the air.
- Duration of Sampling: The duration for which air samples are collected also impacts accuracy. Longer sampling times can provide a more comprehensive picture of mold spore levels, while shorter sampling durations might miss transient spikes in mold spore concentrations.
- Equipment Calibration and Handling: The precision and calibration of the sampling equipment, as well as how the samples are handled and stored, can influence the test outcomes. Improper handling or equipment malfunction can lead to inaccurate results.
Interpretation of Results
Interpreting the results of air mold tests can be challenging. Mold spores are a natural part of the environment, and their presence in air samples does not always indicate a problem. It’s essential to compare indoor mold spore levels with outdoor levels to determine if there is an unusual indoor mold growth. Additionally, identifying the types of mold spores present can help determine the source and potential severity of the issue.
Combining Methods for Better Accuracy
While air mold tests can provide valuable insights, they are most effective when combined with other inspection methods. Visual inspections, moisture assessments, and surface sampling can complement air testing to provide a more comprehensive understanding of mold presence and sources. At SERVPRO, our trained professionals use a combination of these methods to deliver accurate and reliable mold assessments.
Air mold tests are a useful tool in detecting and assessing mold levels in indoor environments. However, their accuracy can be influenced by various factors, and results should be interpreted with caution. Combining air testing with other inspection techniques can enhance the reliability of mold assessments. If you suspect mold in your home or business, contact SERVPRO for a thorough and professional mold inspection and remediation service.
For more information on mold testing and remediation, visit our website or call us today. At SERVPRO, we are Here to Help® you maintain a safe and clean environment.
Water Damage in Commercial Properties: Retail Spaces and Warehouses
6/12/2024 (Permalink)
 With the right knowledge and prompt action, you can minimize the downtime and get your commercial property back on track.
Water damage is an unfortunate incident that can occur in any commercial property, including retail spaces and warehouses. Whether it's a leaky roof, burst pipe, or flooding from heavy rain, water damage can disrupt your business operations, damage inventory, and lead to costly repairs. However, with the right knowledge and prompt action, you can minimize the downtime and get your commercial property back on track.
Identify the Source of the Water Damage
The first step in addressing water damage is to identify the source. Quickly locate and shut off the water supply to prevent further damage. In retail spaces and warehouses, common sources of water damage include roof leaks, malfunctioning plumbing systems, and weather-related incidents. By identifying the source, you can better understand the extent of the damage and take appropriate measures.
Prioritize Safety
Before entering the affected area, ensure that it is safe to do so. If there are any electrical appliances or exposed wires, turn off the power immediately to avoid the risk of electrocution. Exercise caution and consider professional assistance when dealing with extensive water damage or potential structural issues.
Contact a Professional Commercial Restoration Service
Commercial water damage requires professional expertise to ensure thorough and efficient recovery. Contact a reputable commercial restoration service like SERVPRO® as soon as possible. SERVPRO specializes in commercial water damage restoration and understands the unique challenges faced by retail spaces and warehouses. Their experienced team can help assess the damage, provide expert solutions, and restore your commercial property efficiently.
Document the Damage and Notify Insurance
Before any restoration work begins, document the water damage by taking photos and videos. This documentation will be crucial when filing an insurance claim. Notify your insurance company promptly to initiate the claims process and ensure you have all the necessary paperwork ready.
Remove Standing Water
If it is safe to do so, start the water extraction process to remove standing water from the affected areas. Utilize pumps, wet vacuums, or other appropriate equipment to remove as much water as possible. Swift removal of standing water helps minimize potential damage to structural components and reduces the risk of mold growth.
Dry and Dehumidify
After water extraction, it is vital to thoroughly dry the affected areas. Use powerful fans and dehumidifiers specifically designed for commercial spaces to accelerate the drying process. This step is critical in preventing the growth of mold and mildew, which can be damaging to inventory and affect the air quality within your commercial property.
Assess and Restore Inventory and Fixtures
Once the affected areas are dry, evaluate the condition of your inventory and fixtures. Dispose of any damaged or unsalvageable items following the guidance of your insurance provider. Clean and sanitize salvageable items to ensure they are safe for use or sale. Additionally, inspect and repair any damaged fixtures such as shelving, display units, or flooring to return your commercial property to its pre-damage condition.
Prevention is Key
To minimize the risk of future water damage, it's essential to implement preventative measures. Regularly inspect your property for any signs of leaks, roof damage, or plumbing issues. Ensure your property's drainage systems are clear and functioning correctly. Address any identified issues promptly to mitigate potential water damage risks.
In conclusion, water damage in commercial properties such as retail spaces and warehouses can have severe consequences for your business. By following these recovery and clean-up tips, along with the assistance of a professional commercial restoration service like SERVPRO, you can minimize the impact of water damage and restore your commercial property efficiently. Act promptly, document the damage, and rely on expert help to ensure a thorough and effective restoration process.
Water Damage in Rental Properties: Tips for Landlords
2/22/2024 (Permalink)
 Water damage is a significant concern for landlords managing rental properties.
Water damage is a significant concern for landlords managing rental properties. At SERVPRO®, we understand the critical importance of addressing water damage issues promptly and efficiently. In this guide, we'll provide crucial insights for landlords regarding water damage in rental properties and how to handle such incidents effectively.
Understanding Landlord Responsibilities
Landlords have a legal obligation to maintain their rental properties in a habitable condition, ensuring they are safe and free from potential hazards like water damage. It's essential to comprehend these responsibilities to address water damage incidents promptly and appropriately.
Preventive Measures
Prevention is key in mitigating water damage risks. Encourage regular property inspections to identify potential issues such as leaks, plumbing problems, or inadequate drainage. Educate tenants about reporting any signs of water damage promptly.
Prompt Response to Water Damage Reports
Tenants reporting water damage concerns should be taken seriously and addressed immediately. A timely response can mitigate further damage, demonstrate landlord commitment, and foster a positive landlord-tenant relationship.
Insurance Coverage
Landlords should possess comprehensive property insurance that includes coverage for water damage. Familiarize yourself with the policy's coverage limits, deductibles, and exclusions related to water damage incidents.
Professional Restoration Services
In the event of water damage, promptly engage professional restoration services like SERVPRO of Cape Coral. Trained professionals can assess the damage, initiate cleanup and restoration, and mitigate further issues, ensuring a quicker recovery.
Documentation and Communication
Maintain detailed records of any water damage incidents, including reports, repair invoices, and communication with tenants. Clear communication regarding the restoration process and expected timelines is crucial for transparency.
Preventive Maintenance Agreements
Consider establishing preventive maintenance agreements with reputable contractors or service providers to conduct routine inspections and address potential issues before they escalate into larger problems.
Legal Obligations and Tenant Rights
Comply with local landlord-tenant laws and regulations regarding water damage incidents, repairs, and tenant rights. Understanding legal obligations ensures landlords act following the law.
Addressing water damage in rental properties requires proactive measures, swift responses, and adherence to legal responsibilities. By understanding these aspects and partnering with professionals like SERVPRO of Cape Coral, landlords can navigate water damage incidents effectively, protecting their investment and maintaining tenant satisfaction.
Why Time is of the Essence After Water Damage
10/9/2023 (Permalink)
 In Cape Coral, rapid response to water damage is not just a matter of convenience; it's a necessity.
Water damage is a common and often underestimated threat to homes and businesses in Cape Coral. Whether it's due to a burst pipe, a leaky roof, or a natural disaster, swift action is crucial when water damage occurs. In this blog, we'll explore why rapid response to water damage is vital and how it can make a significant difference in minimizing damage and saving both time and money.
Preventing Further Damage
The longer water is allowed to sit, the more extensive the damage becomes. Water can seep into building materials, weaken structural integrity, and promote mold growth within hours. Rapid response helps prevent secondary damage, which can be more costly and challenging to address.
Mold Mitigation
Cape Coral's humid climate creates the perfect breeding ground for mold. When water damage occurs, mold can start to grow within 24 to 48 hours. Rapid water extraction and drying are essential to mitigate mold growth, which can pose health risks and require specialized remediation.
Preserving Belongings
Valuables and personal items can be severely affected by water damage. Quick action can help salvage belongings, such as photographs, documents, and sentimental items. Professional restoration services like SERVPRO® have the expertise and equipment to restore many items that may seem beyond repair.
Minimizing Restoration Costs
The longer water damage is left unattended, the more extensive the restoration process becomes. Rapid response can significantly reduce restoration costs by addressing the issue before it escalates. Timely action can also help you avoid costly structural repairs.
Insurance Benefits
Promptly reporting and addressing water damage can streamline the insurance claims process. Your insurance provider may require immediate action to mitigate damage and approve your claim. Failing to respond quickly may result in claim denials or delays.
Professional Expertise
Engaging the services of a professional restoration company like SERVPRO® ensures that experienced technicians with specialized equipment address the water damage. Their expertise and quick response help expedite the restoration process and reduce downtime.
In Cape Coral, rapid response to water damage is not just a matter of convenience; it's a necessity. Time is of the essence in preventing further damage, mitigating mold growth, preserving belongings, minimizing costs, and navigating insurance claims effectively. When water damage strikes, trust the experienced professionals at SERVPRO® of Cape Coral for a swift and thorough response to protect your property and restore it to its pre-damage condition.
Navigating the Waters: A Step-by-Step Guide to Making a Water Damage Claim
7/17/2023 (Permalink)
Water damage can be a distressing experience for homeowners and property owners. Whether it's a burst pipe, a leaking roof, or a natural disaster, the aftermath of water damage often requires significant repairs and restoration. In such situations, making a water damage claim with your insurance company can help alleviate some of the financial burdens. In this blog post, we will provide you with a step-by-step guide on how to make a water damage claim effectively.
Step 1: Assess the damage and document the evidence
The first step is to assess the extent of the water damage and gather evidence to support your claim. Take photographs or videos of the affected areas, including any damaged belongings or property. This visual evidence will be valuable when communicating with your insurance company.
Step 2: Review your insurance policy
Thoroughly review your insurance policy to understand the coverage for water damage. Pay attention to specific details, such as deductibles, limits, and exclusions. Familiarize yourself with the procedures and requirements for making a claim, as different insurance companies may have varying guidelines.
Step 3: Contact your insurance company
Notify your insurance company about the water damage as soon as possible. Most insurance policies have a specific time frame within which you must report the incident. Provide them with essential details, such as the cause of the damage, the date it occurred, and the affected areas. Follow their instructions regarding the claim process.
Step 4: Document the communication
Maintain a record of all communication with your insurance company. Keep a log of the dates, times, and names of the representatives you speak with. Take notes during conversations, including details discussed and any instructions provided. These records will serve as valuable references throughout the claims process.
Step 5: Mitigate further damage
Take immediate steps to mitigate further damage. This may include drying out the affected areas, removing standing water, or boarding up broken windows or doors. However, only undertake actions that are safe and within your capabilities. Keep records, receipts, and invoices for any expenses incurred during the mitigation process, as these may be eligible for reimbursement.
Step 6: Provide necessary documentation
Your insurance company will likely require specific documentation to process your claim. This may include the evidence you gathered in step 1, a completed claim form, a list of damaged items, and any supporting documents such as repair estimates or invoices. Ensure that you provide all requested information promptly and accurately to avoid delays in the claim settlement.
Step 7: Cooperate with the claims adjuster
An insurance adjuster may visit your property to assess the damage and validate your claim. Cooperate fully with the adjuster, providing them access to the affected areas and any requested documentation. Answer their questions truthfully and provide any additional information they may require. The adjuster's report will play a crucial role in determining the outcome of your claim.
Step 8: Follow up on your claim
Stay in regular contact with your insurance company to inquire about the progress of your claim. Keep track of any claim numbers or reference codes provided. If there are any delays or issues, politely follow up and seek clarification. Maintaining open communication will help ensure that your claim is processed efficiently.
Making a water damage claim requires careful preparation and adherence to the insurance company's procedures. By following this step-by-step guide, you can navigate the claim process more effectively. Remember to document the damage, review your policy, communicate promptly with your insurance company, and provide all necessary documentation. While the claims process may take time, staying organized and proactive will help you achieve a fair settlement and restore your property after water damage.
What should I do with my water damaged electronics?
3/13/2023 (Permalink)
You are just about to leave for work, and you realize that there is a leak in your bathroom. You rush to the kitchen sink, grab an empty glass and fill it up with water. You take two steps out of the kitchen and drop the glass on the floor. The glass shatters into pieces, but what worries you is that you can still hear water dripping from the faucet behind you. Your first thought may be: "My electronics!" If your home has experienced water damage from a flood or leaky pipe, then it's important to act quickly to salvage any important items in your home. Here are some tips on what to do if this happens.
Water Damage is quick.
Water damage can happen in an instant, but its effects are long-lasting. If you have water damage to your electronics, the longer you wait to address it, the more it will cost you. Water is one of the most destructive forces, don't wait, call the professionals quick.
If you have experienced any kind of water damage or if your device has been submerged in liquid, give SERVPRO a call quickly. We are available 24/7.
Don't wait.
The longer you wait to address water damage, the more it will cost you. As soon as possible after a spill or other exposure to water, remove the device from its source of moisture and place it somewhere dry. Then begin drying out your device immediately with a towel or paper towel (do not use an electric fan as this may cause more damage).
If your device can still power on after being exposed to water, turn off its power and leave it alone until you can get help from someone who knows what they're doing. If there is any chance that liquid has entered the interior components of your electronic device, for example if there was visible condensation inside when turned back on, you should not attempt any further repairs yourself but instead seek professional assistance immediately.
Contact a professional.
If you're not sure whether or not something needs professional attention, it's best to call a professional as soon as possible. It could cost more money in the long run to try to fix the electronics on your own. Professionals have the experience and equipment to help restore your electronics back immediately. Getting immediate help can save you money and ensure the electronics are restored properly.
Give the professionals a call at SERVPRO of Cape Coral for your water damaged electronics.
Signs of a Hidden Water Leak in Your Bathroom
11/5/2022 (Permalink)
Signs of a Hidden Water Leak in Your Bathroom
If you've got a leak in your bathroom, it's not the end of the world. It happens to everyone, and there are ways to fix it. But if you're not sure what's going on with your plumbing, it can be hard to know where to start. This article can help you better understand the signs of a hidden water leak in your bathroom. If any of these signs apply to you or your home, then there's probably some unseen damage happening below the surface:
High Water Bill
If your water bill is higher than usual, don't ignore it. You may think that since you haven't changed the way you use water and your meter isn't broken, the problem must be in your head. But that's not always the case. It could be that there's been an unexplained leak in your home and you're paying for it without even realizing it! If your water bill is unusually high, you might have a hidden water leak!
Discolored Ceiling or Flooring
Water spots on the walls and ceilings are a sign of hidden water leaks because they form when a pool of water in the tub, toilet, or sink drips down, evaporates, then leaves behind minerals and bacteria that build up over time.
When water accumulates in your wall or ceiling, it can lead to dark stains. It is also common to see yellow stains as well. If you see any discoloration on your ceiling or floors, it could be a sign of a water leak.
If your bathroom has an overhead light fixture with exposed wires (like most do), use caution when inspecting for moisture damage here—you could be electrocuted if you come into contact with wet electrical components!
Dripping Noise or Running Water
If you hear a dripping noise or running water in the bathroom, it may be a sign that a hidden leak is occurring. This can obviously be heard at home, but if you're hearing this sound outside of your house as well, it could mean that the leaks are expanding and spreading to other areas of your property. If this is happening on multiple floors or in different rooms throughout your home, then it's definitely time for some repairs!
Musty Odor
If you notice a musty odor in your bathroom, it's likely that there is mold present. Mold can cause serious problems for you and your family, as well as damage to your home. The smell of mold can be difficult to remove from a room and even more difficult to remove from furniture or other materials.
If you think you might have a hidden water leak in your bathroom, call SERVPRO!
If you think you might have a hidden water leak in your bathroom, contact your local SERVPRO team immediately. Hidden water leaks can cause serious damage to your home if left untreated. Hidden water leaks are can be hard to find, especially if they are located behind walls or under floors! Your local SERVPRO team will use advanced technology to locate any hidden leaks that might be present in your home and then take the necessary steps to mitigate the damage.
5 Reasons Pipes May Make Noise
7/25/2022 (Permalink)
Here are Five Common Sounds
A local water damage restoration service can help with water clean-up if your Cape Coral, FL, home suffers a pipe break. However, there are a number of sounds you may hear before large-scale issues arise. It’s important to know what these sounds mean so that you can avoid a potential pipe burst Here are five common sounds.
1. Water Pressure
If the water pressure is too high it can cause a vibration in the pipes resulting in a humming sound. The recommended pressure level is usually around 55 psi. It’s best to contact a professional for help in order to avoid a pipe burst from incorrect water pressure.
2. Air Bubbles
If there’s a problem with your water line there is a chance that air bubbles can be trapped inside. This can result in a banging sound or sputtering right when a faucet is turned on.
3. Loose Fastenings
If a pipe is incorrectly fasted to the wall it can vibrate as water moves through it resulting in a rattling sound. If left unfixed this could result in a pipe break as well.
4. Worn Components
It’s also possible for washers and other plumbing components to wear down over time. This is usually seen in older plumbing systems or areas of high use. Most often the sound that results from this is a squeal or whistle.
5. Drainage
If there is an issue with water draining you may hear a gurgling sound coming from the pipes. This could indicate that there is debris or some other sort of obstruction. A professional can help remedy this problem before a blocked drain results in water overflow.
To help avoid a pipe break take note of any noises your plumbing may be making and contact a professional for repairs. If it becomes necessary to fix broken pipe flooding, a local water damage restoration service can help.
6 Steps to Flush Your Water Heater
3/9/2022 (Permalink)
How to Flush Your Water Heater In 6 Easy Steps
A regular part of maintenance on your home in Bokeelia, FL, is periodic flushing of your water heater. It's a simple process, but taking safety precautions and making sure the water and sediment have a place to go are important. Water remediation experts recommend the following steps to avoid flooding your home.
1. Turn off Power
Before you begin the water heater flush, make sure all power is off. The pilot light on gas models should go out, and the circuit that supplies an electric model should be switched off.
2. Put on Gloves
As you may expect, water from the heater will be hot, so it's important to wear protective gear over your hands. Heavy duty work gloves protect you from getting burned.
3. Set up Drain Hose
Connect the hose you are using to the drain valve on your water heater. Place the other end of the hose in the area where you want the water and sediment to deposit.
4. Drain the Heater
Opening the drain valve allows water to flow through. You can turn on the hot water faucet in your kitchen to speed up the process. Flush it a couple of times to make sure all the sludge is gone and then close the valves to prepare to refill the heater.
5. Fill the Tank
Turn the water back on to fill the tank. You know it is filled when an open faucet goes from a weak to steady stream of water and no more air is coming out of the line.
6. Turn on Power
After confirming the tank is full, you can turn the power on without damaging the heater. Turning the power on lets the water inside it begin to heat up.
Your water heater needs regular care just like any other appliance in your home. Flushing the sediment out allows it to continue working efficiently.
Factors Affecting Flood Coverage
2/7/2022 (Permalink)
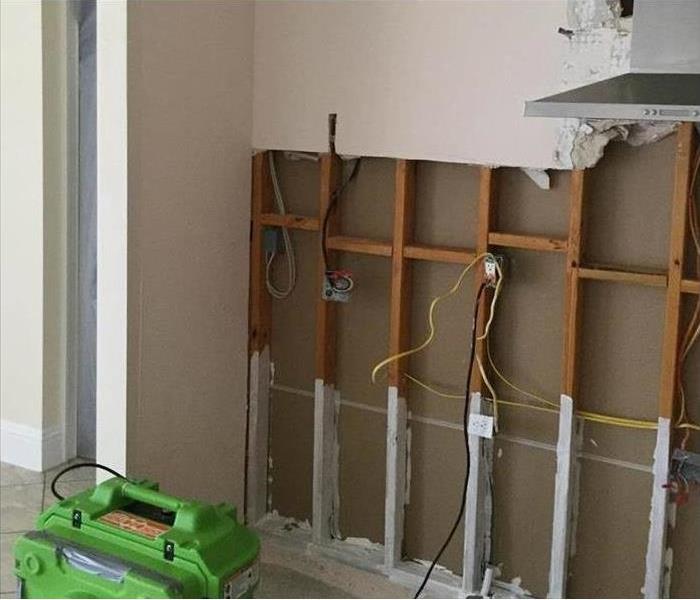 After water damage, sometime flood cuts like seen in this picture are necessary during the restoration process. Call SERVPRO when you need it.
Flood Insurance: Factors to Consider
Deciphering your homeowner's policy can be tricky. If you have a flood in your home in Pine Island, FL, due to a leaking or broken pipe, your insurance company may pay for the remediation of the damage. There are two main factors that determine whether or not your claim will be accepted.
Timing
The damage caused by a sudden pipe burst is a classic example of an issue that is covered by insurance. Pipe repair is generally considered part of regular home maintenance, not part of accident recovery. While your insurance may not pay to fix a broken pipe, it will likely cover the following water restoration services:
- Carpet cleaning
- Flooring replacement
- Drywall and insulation replacement
- Anti-mold precautions
Addressing the problem quickly is vital. If you let a problem go unresolved, causing the damage to get worse, the insurance company is likely to see this as neglect, and your flood claim could be denied.
Cause
Your commitment to regular maintenance is a factor in insurance coverage. If you can demonstrate that you keep your plumbing on a reliable maintenance schedule, the damage resulting from a broken pipe is usually covered. Your insurance will probably even cover secondary damage that occurs later if it is related to an issue that was initially paid for by your policy. If, however, you neglect to fix known problems or allow pipes to freeze and burst because you didn't take the necessary precautions to protect them, your claim may be denied. Most policies require that the problem causing the damage is accidental or sudden in order for the cost of remediation to be covered.
If the flood in your home was caused by a leak or broken pipe, your homeowner's policy likely covers the cost of fixing the damage. As long as you have done your due diligence regarding proper maintenance and prevention, your claim will probably be accepted by your insurance company.
Some Simple Toilet Fixes
1/5/2022 (Permalink)
Simple Toilet Repairs
If you find water pooling around the floor of your bathroom, there’s a good chance you have a leaking toilet. Fortunately, most issues of this type don’t require replacing the entire bowl, and can instead be solved at low cost with a few replacement components.
1. Inspection
The first step is to gain a proper understanding of where problems are likely to occur. While an old toilet will not usually fail in the basin itself, it is possible for the wax seal beneath the toilet to disintegrate over time. To check the status of the seal, simply remove the plastic-capped bolts holding the toilet to the floor. Be sure to cut off the water supply line beforehand and empty the tank of the leaking toilet.
2. Replacement
If you have ascertained that the seal has failed, the next step in the toilet repair process is to purchase a replacement seal that fits your specific drain. Scrape the remaining pieces of the seal away from the outlet with a putty knife or other flat-bladed tool and place the new one over the drain. When reinstalling the toilet, it may be necessary to exchange or cut the bolts affixing the unit before replacing the caps.
3. Future Maintenance
Afterwards, it may be advantageous to place a caulk seal at the point where the toilet contacts the floor. This can help keep incidental moisture, such as condensation from shower steam, from seeping under the toilet and causing unwanted mold or bacterial growth. Be sure to also inspect pipes, supply lines, and the inner tank mechanisms for wear and tear that can cause other kinds of leaks. If significant water damage occurs, consider contacting a service specializing in water damage restoration.
While a leaking toilet can be a hassle, don’t hesitate to perform some simple repairs to keep your bathroom in good shape. Manage your home’s plumbing in Burnt Store, FL, properly to prevent lasting damage.


 24/7 Emergency Service